What are gametophyte ferns?

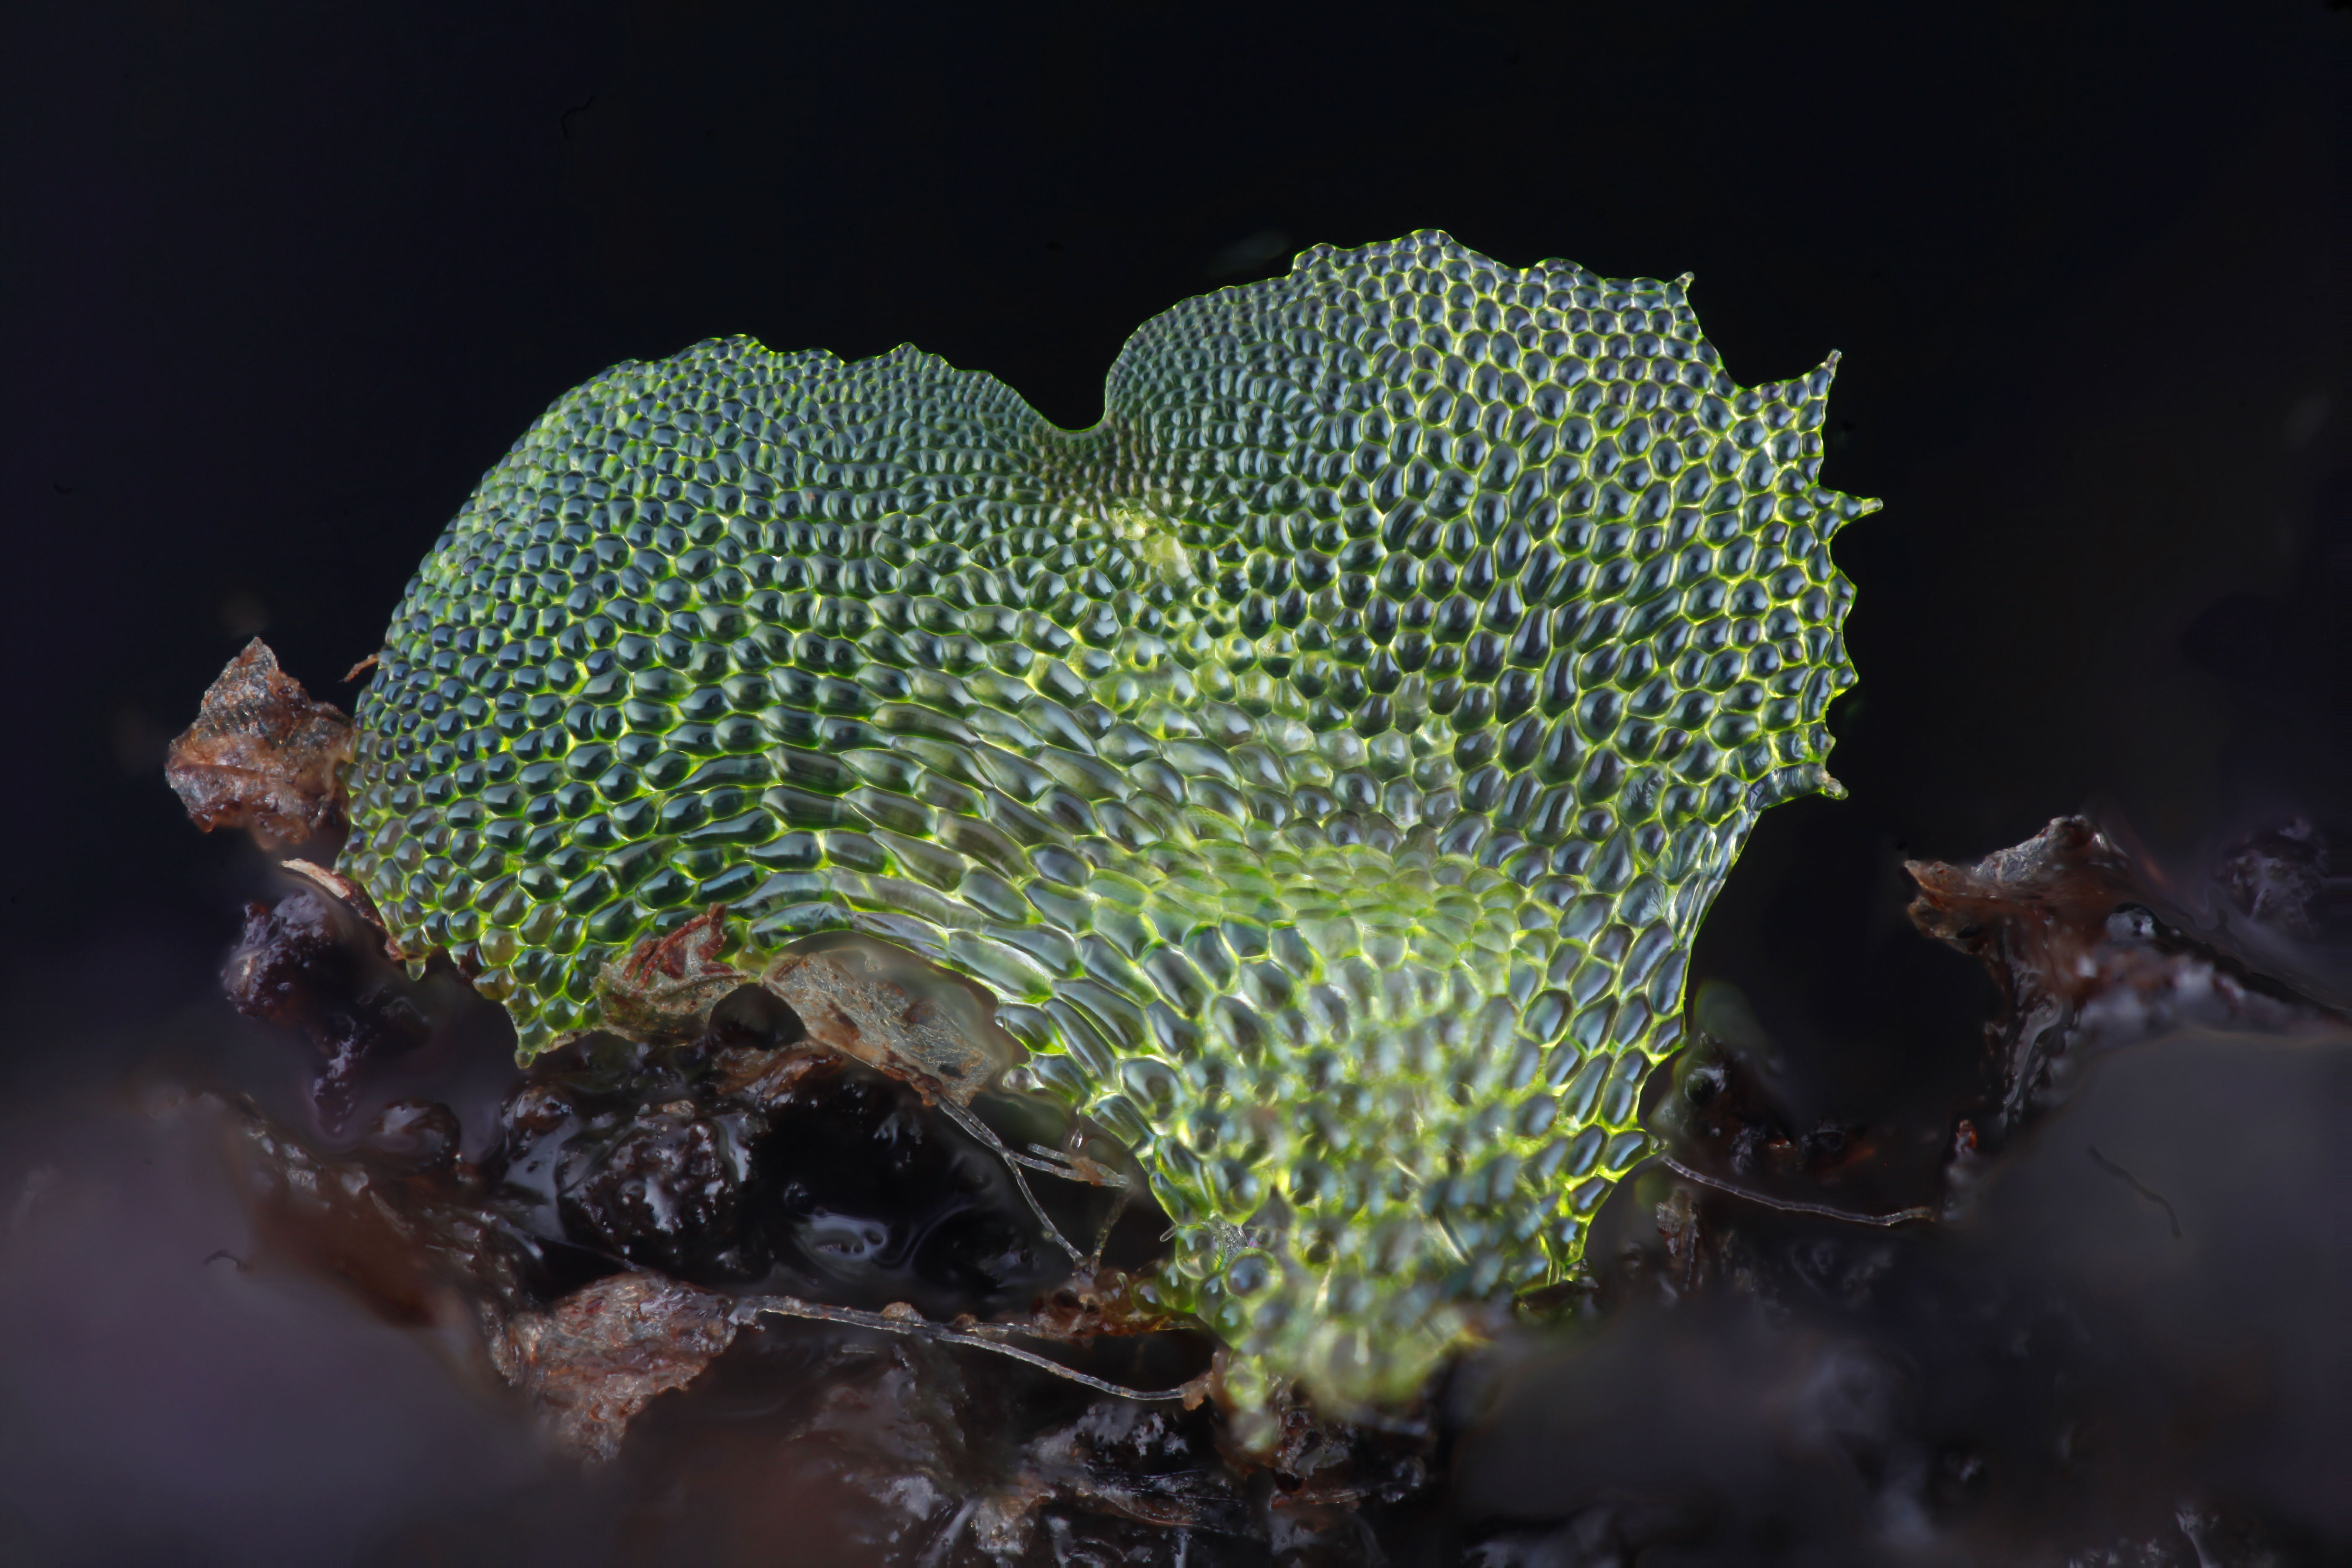
 The plant below is a gametophyte fern. 

It looks strikingly like an early stage Arabidopsis thaliana embryo. 


What is a gametophyte fern? 

It is less than about half a centimetre across, and it will never get very much bigger than this. What is it though, and how does it relate to the big ferns (like the one below) that we are more familiar with from our gardens?

A sporophyte generation plant of the species Dryopteris wallichiana.


Ferns are not quite like people in their mode of their reproduction. They have a system called "alternation of generation". 

In alternation of generation, there are two separate generations in the life cycle of the plant, each one giving rise to the other. 

A tiny gametophyte plant (top photo above) reproduces to make a new large sporophyte plant (second photo above). Then the large sporophyte plant reproduces to make a new tiny gametophyte plant. And round they go again, alternating between sporophyte and gametophyte for ever.

The two plants are both individuals in their own right, and they can live independently of one another.

What are these sporophytes and gametophytes?


A sporophyte fern is a large plant that produces spores. We can easily see the spores clustered on the underside of the leaves of ferns that we meet in the garden. The spores each have only one set of chromosomes. When they fall off the leaves of the large sporophyte fern, they land on the ground and develop into tiny gametophyte plants.

The tiny gametophyte plants have only one set of chromosomes in each of their cells. The plants never grow much larger than a centimetre across. At maturity (a few weeks) they produce egg and sperm cells which also only have one set of chromosomes. 

The sperm cell swims across the plant's surface to either the egg cells of that same plant, or possibly even to those of an adjacent plant. When it finds an egg cell, it fertilises it. This fertilisation event produces a cell with two sets of chromosomes, which then goes on to develop into a large sporophyte fern plant.

It always astonishes me that something as deceptively simple as a fern has such a complicated life cycle. It actually includes two completely different plants, which take turns in living their lives.

Some sporophyte ferns are large trees. So this alternation of generation is the size equivalent of a skyscraper giving birth to a shoe, which then gives birth to a new skyscraper. It's pretty odd, and pretty amazing. What's more, the process has been going on quietly and successfully for many many more years than human reproduction, in spite of its complexity.


Here are some more photos of gametophyte ferns.


If you would like to know more about how these photos were taken, please visit http://chlorophyllosophyimages.blogspot.com/2017/12/focus-stacking-setup.html

If you would like to grow your own fern gametophytes, please visit this page:

How to grow gametophyte ferns

 This is a gametophyte of the fern Asplenium scolopendrium. It is only about 2mm across and is composed of a heart shaped sheet of cells that is only one cell thick. Fern gametophytes are easy to grow and you can do it at home. 


Finding spores


First you need to find some fern spores. You can buy some online by searching with the phrase "buy fern spores online" or you can find some on a fern plant in late summer. 

To find some on a fern, choose a fern leaf in late summer, when it has brown dots on the underside of the leaf as in the photograph below. 


The brown dots are called sori (singular - sorus) and each one is a collection of sporangia (singular - sporangium). This photo shows a leaf whose sporangia have already dehisced. This means that they have already opened and allowed the spores to fall out. If you find a leaf whose sporangia have not yet dehisced then the sori will be smaller and darker brown. 

Find a leaf like this, whose sporangia have not yet dehisced, and lay it on a piece of paper in your house in a warm place, with the sori facing down. Leave it overnight. 

In the morning when you lift the leaf you will find that there is a brown shadow on the paper, in the same shape as the fern leaf. The brown shadow is the pattern of fern spores that have fallen out of the sporangia on to the paper. Fold the paper and tap it so that the fern spores come to the middle of the paper. Fold the paper up and store it in the fridge. They will keep for about a year in most species. 


Sowing the spores


You need a clean pot filled with potting compost. First scald the compost by pouring boiling water through it. This kills off any fungi that could harm the gametophytes. 

Scalding soil before sowing fern spores.


Next allow the soil to drain and cool completely to room temperature. Once the soil is cool, sprinkle the fern spores on the surface of the soil. Then enclose the whole pot in a large freezer bag. Inflate the bag by blowing into it, and knot it at the top. The picture below shows a blue bag, but the bag must be transparent, and should ideally be colourless.

Enclosing the pot in a bag to give a humid atmosphere and to avoid needing to water the pot.


Put the whole assembly somewhere at room temperature by a window that is not too hot or bright. 

In Cambridge I find that they grow unshaded in winter and are visible in about 2 months. In summer I have to shade them under a piece of paper when the sun shines directly in the window and then they are visible in about 4 weeks. 

Check occasionally for growth. The pot will not need watered, until you remove the bag. 

If you start to see fungus growing and making the gametophyte turn grey, remove the healthy gametophyes in clumps to a new pot and grow them without the bag. Make sure to keep watering them regularly so that the soil surface never dries out. 


After a few more weeks you will see the tiny first leaf of the sporophyte plant developing. 


The Double-Lip Embouchure in Clarinet Playing Presented by Victor A. Battipaglia

The Double-Lip Embouchure in Clarinet Playing, by Victor A. Battipaglia, is deeply insightful and very thorough technical explanation of the technique and advantages of the use of the double-lip embouchure in clarinet playing. I very much enjoyed reading it myself, and so have asked for permission to convert the orginal scanned pdf document to a more accessible format, so that others can also enjoy it.

The first file below is the original PhD thesis of Victor Battipaglia, on the double lip embouchure in clarinet playing. It was originally a typewritten document, and was scanned in and converted to a pdf by the Eastman School of Music - Sibley Music Library of the University of Rochester, which is the institution where he carried out the work. I downloaded this scanned file from the website of the library

I created the second pdf file below by converting the scanned, type-written document to a Microsoft Word doc, and then to a pdf. The initial conversion used an online computer programme, and then I fixed the formatting, added in the accents, and sorted out the italics, bold print, and underlining. I hope that by providing this converted file, I will enable people to read the work more easily. With this new file, they will be able to use accessibility software and translation aids which are so easily available now.

The author, Dr Victor Battipaglia, has now sadly passed away, and is greatly missed. This work of converting the file and making it available online has been carried out with the kind permission of his wife, Dr Diana Mittler-Battipaglia, and of the staff at the library of the University of Rochester.

To download either of these files, maximise the windows by clicking the arrow in the top right corner, then use the download button at the top right of the screen. The download button looks like a down-pointing arrow.


Focus Stacking Setup


Click this image to visit the YouTube videos, which will explain how the system
 works, and how any other group or lab can make their own working system. 

What is it?


This page is about our focus stacking setup. I use it to take photographs of tiny plant specimens that are between about 0.2mm and 1cm wide.

Please feel free to copy it.


I am very happy for anyone to build a duplicate system, and have written detail instructions to help people and research labs to do this. If you would like to have a go, please watch the videos, or read the pages linked below. If you do try, I would love to hear from you about how you get on.


How can I do this for £100 if I am in a University or similar? 

My hope in writing this is that an honours student in a University might be able to copy this system for only about £100, with a certain amount of borrowing and scavenging of equipment and parts. If you would like to know how to do this please see the parts and sourcing list.

Where are the building instructions?


OpenPlant Project 2018


GitHub write-up

Hackter write-up

YouTube Channel


Biomaker Challenge 2017 


Hackster write-up

GitHub write-up


To see some of the photos taken with this setup please visit my image library at http://www.chlorophyllosophy.co.uk/

The small versions of my images are available free for teaching purposes. For full sized versions of the images for teaching or commercial purposes, please contact me through the form at http://www.chlorophyllosophy.co.uk/.


Who did this work?


Who built it?


The system was put together in a collaborative effort between a large number of people. The people who worked together to build the system are shown on the GitHub and Hackster pages listed below.

A great deal of technical expertise was contributed by the members of the photomacrography.net discussion forum.

The bulk of the work was carried out on a volunteer basis, by me (Jennifer Deegan), and Tim Deegan, working at home, for fun. If you do try to duplicate our system, we hope you enjoy it as much as we do.

Which groups funded it?


Some of the work was funded by two OpenPlant grants, in collaboration with the University of Cambridge and the John Innes Centre. The OpenPlant grant was in turn funded by the BBSRC and EPSRC.

How do I give attribution if I copy it?


In any publications that may arise from duplicate systems, please include in your acknowledgements, our publication of the system method: Deegan, J., and Deegan, T., 2018, The Pteridologist Magazine.


Who inspired this work?


The Photography of Professor M.B. Wilkins


To read more about the photography of Professor M. B. Wilkins, please follow the link at the top right of this page.

The Bratcam by Chris Slaybaugh


To read more about Chris Slaybaugh's Bratcam, on which my system is based, please visit his write-ups on the photomacrography.net website. The first volume is here and the second is here.

The Photomacrography.net Forum


In designing and building my system, I received a great deal of advice and help from the members of the photomacrography.net forum. To see the discussions that led to the building of my system please see the thread here.


This work was carried out by Jennifer Deegan in Cambridge. She was working especially with Tim Deegan, but also with the help of many collaborators, who are all listed on the GitHub and Hackster write-ups listed above.

Coleoptiles

Images of coleoptiles
and the growth patterns shown under light and hormone treatment,
from the collection of Prof M.B. Wilkins. 

Please see the Collection Page for a fuller explanation.

To see all of the images easily, click on the first, and page through using the left/right arrows. 

Both original slides and full-size scanned images are available. The initial scan was done very quickly, but slides can easily be rescanned to straighten images where needed. The images displayed are cut down to a small size to avoid copyright infringement.

My scanner struggled with this particular set of images because the black backgrounds made it very difficult for it to figure out which area of the slide to scan. Where these slides in particular are needed I will go back and rescan where required.